You step out of the shower, look at your soaking wet hair, and think: can I just straighten it now? If you've ever tried it with a regular flat iron, you'll know the answer is a very firm no — the sizzle, the steam, the smell. Not ideal.
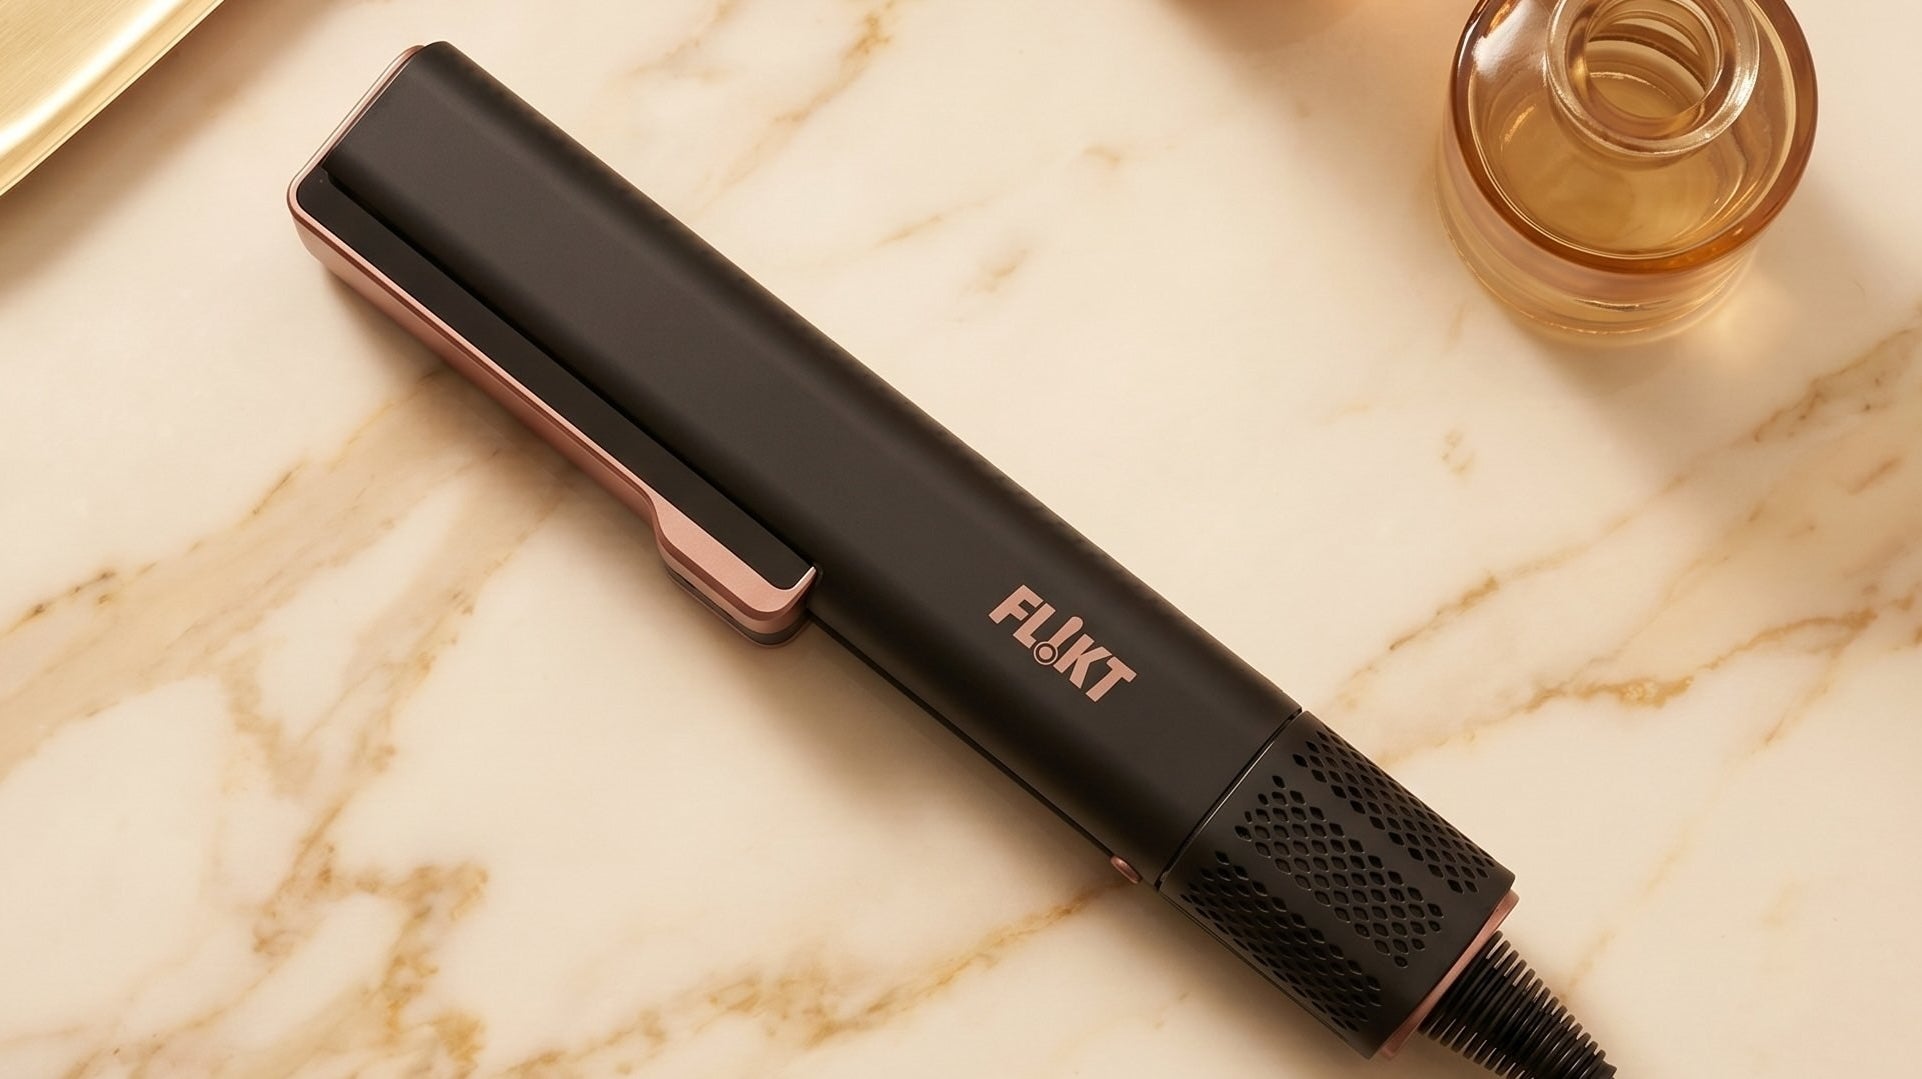
But the FL!KT Wet-to-Straight Hair Styler is a different category entirely. Engineered specifically to work on towel-dried hair, its 110,000 RPM brushless motor and 200 million negative ions deliver a single pass that dries and straightens simultaneously — cutting your routine in half without a heating plate in sight.
This guide covers everything: how wet-to-dry straighteners actually work, why they're safer than using a regular flat iron on wet hair, how to use one properly, and what to realistically expect for different hair types.
Table of contents
What is a wet-to-dry straightener — and how is it different?
A wet-to-dry straightener is a hair tool specifically engineered to dry and straighten your hair in a single pass. Unlike a traditional flat iron, which is designed only for use on completely dry hair, wet-to-dry tools have built-in steam vents or airflow systems that safely release moisture as you style.
The key difference comes down to technology. Standard flat irons clamp two heated plates directly onto your hair at temperatures between 180–230°C. On wet hair, this flash-boils the moisture trapped inside each strand, creating steam that literally bubbles up within the hair shaft — weakening it, causing breakage, and leaving a crispy texture that no serum can fix.
The FL!KT Wet-to-Dry Hair Straightener manages moisture release through an aluminium-free, airflow design. Airflow at 11.2 m/s passes through the open arms, drying and straightening simultaneously without the thermal plate contact that causes damage on standard irons.
Why you should never use a regular flat iron on wet hair
This is worth being direct about, because a lot of people do it and don't immediately see the consequences — until they do.
When your hair is wet, the keratin proteins that give it structure are weaker and more vulnerable. Apply intense, direct heat at that moment and you're causing damage on two levels: the outer cuticle layer is disrupted, and the internal cortex — the core of each strand — is being effectively boiled from the inside.
The result over time: split ends, increased breakage, rough texture that becomes progressively harder to manage, and in some cases permanent changes to your hair's natural pattern. Heat protectant cannot fully compensate for this — it's not designed to handle the moisture-plus-heat combination that happens with a standard iron on wet hair.
A wet-to-dry tool purpose-built for this job is the only safe way to style hair before it's fully dry.
How wet-to-dry straighteners work
The technology inside a good wet-to-dry straightener does three things simultaneously:
Steam venting
Built-in vents allow moisture to escape safely as the plates glide through your hair, rather than being trapped between the plate and the strand. This prevents the internal steaming effect that causes structural damage.
Controlled lower-temperature heat
The FL!KT Wet-To-Straight Hair Styler operates at significantly lower temperatures than standard flat irons — three precise settings: 80°C for fine hair, 120°C for everyday use, and 140°C for thick or coarse hair.
This is enough to reshape the hair and evaporate moisture without the aggressive heat that causes cuticle damage. The trade-off is that it takes a little longer per section, but the result is smoother and healthier.
Smart features that work in the background
The FL!KT Wet-to-Straight Hair Styler isn't just powerful — it's intelligent. Features that make the difference in daily use:
- Auto Pause — When you set it down with the arms open, airflow automatically reduces after 15 seconds. Pick it back up and it reactivates instantly.
- Idle Mode — Powers down automatically after 5 minutes of inactivity. No more worrying about leaving it on.
- Boost Mode — A shot of extra heat for an instant style refresh on already-dry hair.
- Cool Mode — Close the arms and direct airflow downward for a smooth, heat-free finish to lock your style.
- LCD Display — Full visibility of your temperature and mode at all times.
- Removable Filter — Easy to clean for low-maintenance upkeep.
What results to expect by hair type
Wet-to-dry straighteners work across all hair types, but the results and approach vary. Here's what to expect:
Hair Type |
What to Expect |
Tips |
Straight / Fine |
Excellent results. Smooth, sleek finish in fewer passes. |
Use the lowest heat setting. Fine hair is most vulnerable to heat damage. |
Wavy |
Very good results. Most users with wavy hair achieve a sleek, frizz-free finish. |
Section hair carefully. Work root to tip in slow, steady passes. |
Curly (Type 3) |
Good for stretching and smoothing. Sleek results may need extra passes or pre-drying roots. |
Use smaller sections. Pre-dry roots with the straightener held open as a mini dryer. |
Coily (Type 4) |
Best used as a stretching and low-heat prep tool before further styling. Full sleekness may need follow-up. |
Very small sections. Go slowly. Prioritise moisture and heat protection before any pass. |


How to use a wet-to-dry straightener properly
Getting the best results is mostly about preparation. Follow these steps every time:
Step 1: Towel dry first — don't skip this
Dripping wet hair is too much moisture for any wet-to-dry tool to handle efficiently. Blot your hair gently with a microfibre towel until it's damp, not dripping. Microfibre is ideal because it absorbs water without roughing up the cuticle the way a standard towel does. This step also shortens your overall styling time.
Step 2: Apply a heat protectant formulated for damp hair
Not all heat protectants are created equal — specifically, not all of them work on wet hair. Look for one that states it's formulated for use on damp or wet hair, typically containing ingredients like hydrolysed proteins or silicones. Apply evenly from roots to ends, then comb through with a wide-tooth comb to distribute evenly and remove any tangles before you start.
Step 3: Section your hair
Divide your hair into 4–6 sections depending on thickness. Clip each section up and work from the bottom layers upward. Working in organised sections gives you a cleaner finish and means each part of your hair gets one proper, controlled pass — rather than multiple messy ones that increase heat exposure.
Step 4: Set the right temperature for your hair type
Fine or damaged hair: use the lowest setting (80°C). Medium thickness/wavy hair: 120°C. Thick or coarse hair: 140°C. Always start low and increase only if needed. The goal is one slow, steady pass — not repeated fast ones.
Step 5: Glide slowly, root to tip
Start just below the roots and glide steadily toward the ends. You'll hear a gentle hiss as moisture evaporates — that's normal and expected. What you don't want to hear is an aggressive crackling or popping sound, which means the hair is too wet or the temperature too high. One or two passes per section is all you need. Resist the urge to rush.
Step 6: Finish with a cool shot
Use the cool shot mode for a final pass after each section. This helps lock the style in place by cooling the hair in its newly straightened position, giving you longer-lasting results and added shine.
Common mistakes — and how to avoid them
Starting with soaking wet hair
Even the best wet-to-dry tool can't work effectively on dripping hair. You'll get poor results and unnecessary heat exposure. Always towel dry to damp first.
Moving too fast
Rushing means your hair doesn't fully dry and straighten in one pass — so you end up going back over it, doubling your heat exposure. Slow, deliberate movements give better results with less damage.
Using too high a temperature
The lower heat settings on a wet-to-dry tool work because of the airflow and venting system — trust the technology. Starting at the highest setting isn't faster, it just creates more risk of damage.
Skipping heat protectant
Even though wet-to-dry tools operate at lower temperatures than standard irons, heat protectant still matters — especially on damp hair where the cuticle is more open and vulnerable. It's a non-negotiable step.
Using a regular flat iron on wet hair
This one's worth repeating. If your straightener isn't specifically designed for wet hair — if it doesn't have steam vents or an airflow system — don't use it on damp hair. The damage is real, cumulative, and often permanent.
Frequently asked questions
Can you straighten wet hair with a normal flat iron?
No. Using a standard flat iron on wet hair is one of the most damaging things you can do to it. The intense heat boils the water trapped inside each strand, causing internal bubbling that weakens the hair structure. Over time this leads to breakage, split ends, and permanent texture damage. Only use a tool specifically designed for wet-to-dry styling.
How wet does your hair need to be for a wet-to-dry straightener?
Damp, not dripping. Towel dry your hair with a microfibre towel after washing until it's no longer dripping — this is the ideal starting point. Soaking wet hair takes longer to style, produces worse results, and puts more strain on the tool. 'Damp' means the hair feels moist but isn't releasing water when you squeeze it.
Can I use it on dry hair too?
Yes — select Dry mode and use Boost for a shot of extra heat to refresh or restyle already-dry hair. Cool Mode (arms closed, airflow directed downward) gives a smooth, heat-free finish to lock style in place.
Are wet-to-dry straighteners damaging?
They're significantly less damaging than using a conventional flat iron on wet hair. The steam venting system and lower operating temperatures (80–150°C vs 180–230°C for standard irons) mean far less heat stress on the hair. That said, any heat tool can cause damage if overused, so a heat protectant and sensible frequency of use still matter.
Do wet-to-dry straighteners work on curly hair?
Yes, but results vary by curl pattern. For wavy and loosely curly hair (Type 2 and 3a), wet-to-dry straighteners typically deliver excellent sleek results. For tighter curl patterns (3b, 3c, 4a–4c), they work best as a stretching and low-heat prep tool before further styling, rather than as a standalone route to full sleekness. Work in smaller sections and go slowly.
Do I still need a heat protectant with a wet-to-dry straightener?
Yes. While the temperatures are lower than a standard flat iron, heat protectant is still important — especially because damp hair has a more open cuticle that's more susceptible to heat damage. Use a heat protectant formulated for wet or damp hair (check the label), and apply it before you start styling.
How many passes should I make per section?
One or two passes per section is ideal. More than that and you're accumulating unnecessary heat exposure without meaningfully better results. If one slow, steady pass isn't giving you the result you want, check your section size (smaller sections work better), your starting temperature, and make sure the hair isn't too wet before you begin.
Can I use a wet-to-dry straightener on dry hair too?
Yes. Most wet-to-dry straighteners work perfectly well on dry hair too — they're genuinely two-in-one tools. On dry hair, they function essentially like a high-quality flat iron with ceramic plates, giving you the flexibility to use one tool whatever state your hair is in.
How is a wet-to-dry straightener different from a hot air brush?
Both dry and style simultaneously, but they deliver very different finishes. A hot air brush gives volume and movement — think a blowout effect. A wet-to-dry straightener is designed to deliver a sleek, smooth, straight result. If you want bone-straight hair, a wet-to-dry straightener is the right tool. If you want voluminous and polished, a hot air brush or multi-styler is the better choice.
Share:
Hot Brush vs Round Brush: Which Gives You a Better Blowout at Home?
LED Face Masks: The Complete Guide to At-Home Light Therapy